How to Add Widgets to Your Smartwatch width
Step-by-Step: Adding and Using Widgets on Apple Watch
Every year, Apple rolls out major updates to watchOS, enhancing its smartwatches with new features. With the latest watchOS 10 software, Apple has introduced a brand-new widget UI feature known as Smart Stack. nextpit offers a detailed guide on how to utilize and personalize the improved widget layouts on compatible Apple Watch models, including the Apple Watch Ultra.
What are Smart Stackwidgets
The Smart Stack offers an entirely new user experience, debuting with watchOS 10, which is comparable to the widgets in iOS 17and macOS Sonoma.
It automatically curates and organizes widgets based on active apps, such as timers or workouts, presenting them in a vertical card style. These widgets will also vanish if the associated apps are closed, unless the widgets are pinned (more on this below).
A thoughtful addition is the shortcut button that allows quick access to the Apple Watch apps, located at the bottom of the widget list. Currently, the Smart Stack widgets are mostly limited to Apple's first-party apps. However, support for third-party app widgets is expected to grow over time.
How to activate watchOS Smart Stack widgets
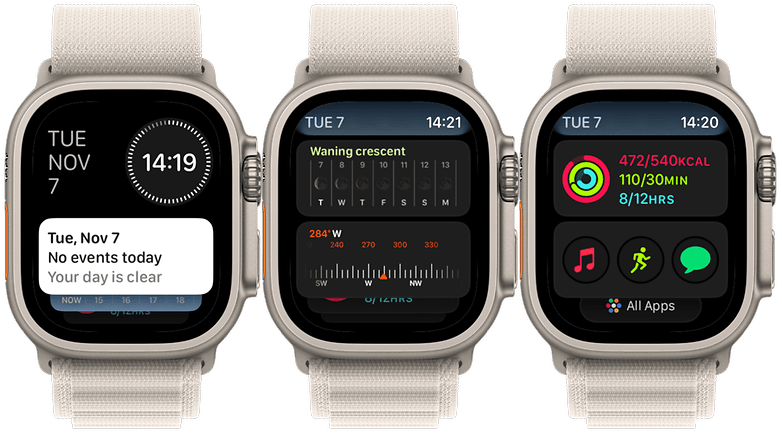
Smart Stack is pre-activated on Apple Watches running watchOS. There are two methods to access it. The first method is by rotating the Digital Crown. The second is by swiping up from the bottom of the main watch face screen. Once you're in the Smart Stack, both the crown and swipe gestures can be used to navigate.
- To access or view the Smart Stack widgets, rotate the Digital Crown upwards.
- Alternatively, swipe up from the watch face screen.
Apple Watch Widgets: How to Add and Make Them Work for You
Users can also add widgets of supported apps. Depending on the types of widgets, some have a few layout optionsyou can pick along with support for customizing complications or elements inside each widget. Below is how to customize the widgets in the Smart Stack screen.
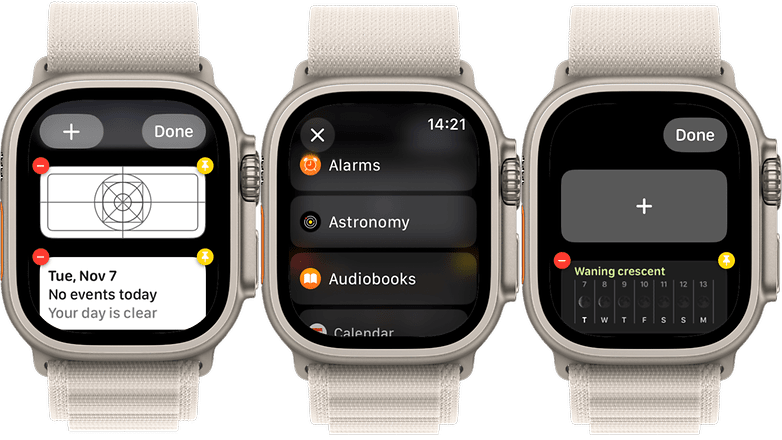
- Go to the Smart Stack widgets screen by rotating or turning the digital crown.
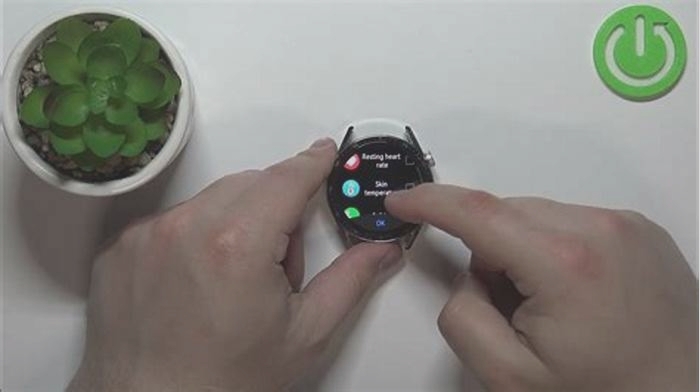
- Long press on any part of the widget screen.
- Once in the edit mode, you can add, remove or pin widgets.
- In widgets with complications, you can also customize the shortcuts by removing and assigning a new one.
- Tap the Done button at the topto save changes.
The arrangement of the Smart Stack will always have the pinned widgets on top while those that are not pinned are located below. At the same time, unpinned widgets may appear or disappear depending on whether the associated app is running or not.
Which Apple Watch models haveStacked Widgets
With the Smart Stack arriving with the watchOS 10, this means the UI is available onApple Watch SE models, Watch Series 4 and later, and the Watch Ultra and Watch Ultra 2 (review).You can check the entire compatibilityas well as other new features ofwatchOS 10here.
- Apple Watch Series 4
- Apple Watch Series 5
- Apple Watch Series 6
- Apple Watch Series 7
- Apple Watch SE
- Apple Watch Series 8
- Apple Watch SE 2 (2022)
- Apple Watch Series 9
- Apple Watch Ultra
- Apple Watch Ultra 2
Are you already using Smart Stack on your Apple Watch? What other new watchOS 10 features do you think are worth highlighting? Share with us your suggestions in the comments.
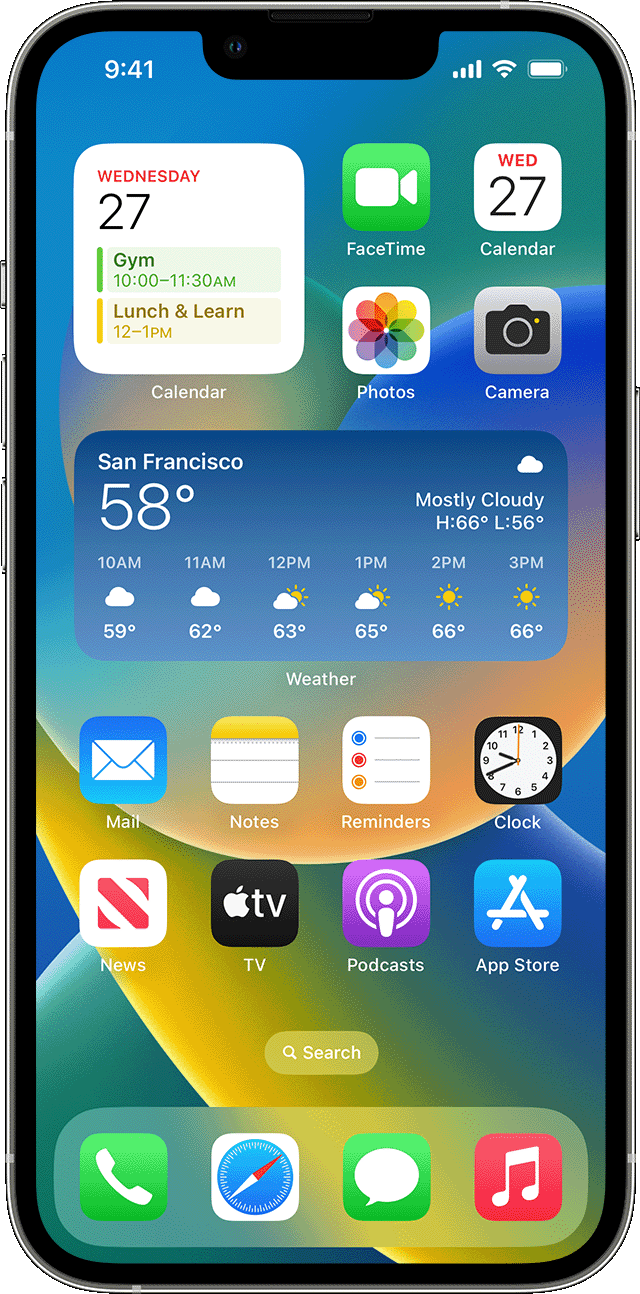
How to add and edit widgets on your iPhone
From the Home Screen, touch and hold a widget or an empty area until the apps jiggle.
Tap the Add button
 in the upper-left corner.
Select a widget, choose a widget size, then tap Add Widget.
Tap Done.
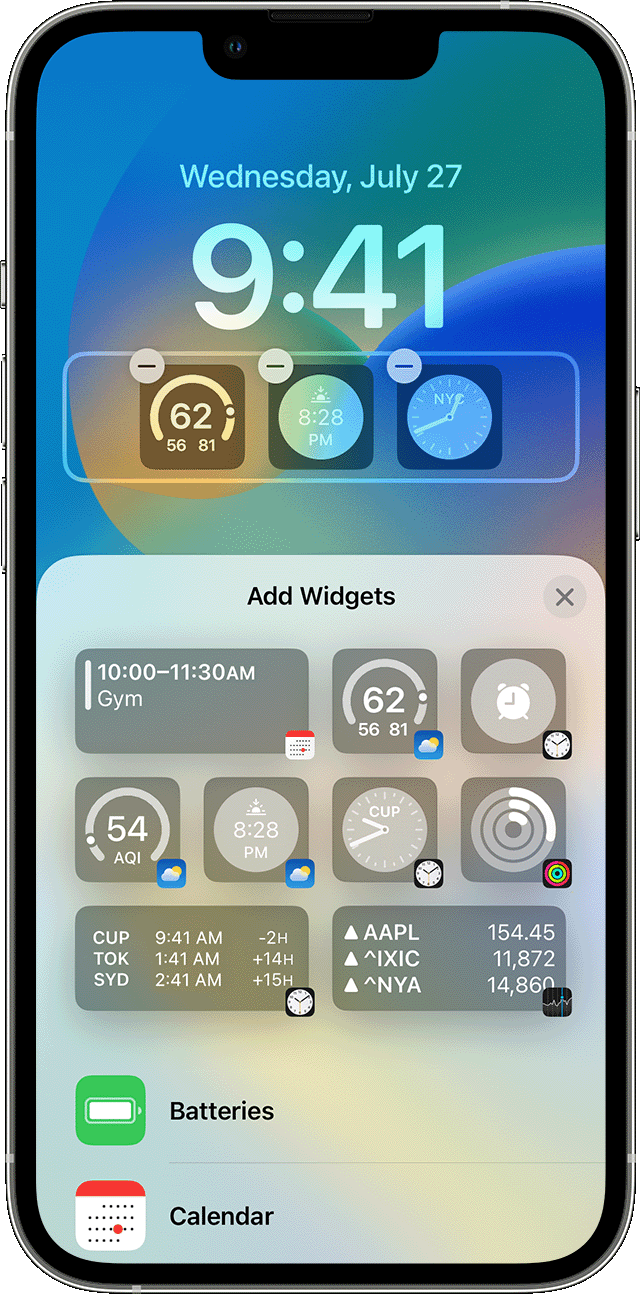
With iOS 16, you can add widgets to your Lock Screen to get information at a glance for example, the temperature, air quality, battery level, or upcoming calendar events.
Touch and hold the Lock Screen until the Customize button appears, then tap Customize.
Select Lock Screen.
Tap Add Widgets.
Tap or drag the widgets that you want to add to the Lock Screen.
When you're finished, tap the close button
 , then tap Done.
If theres not enough room for a new widget, you can tap the Remove button![]() to remove a widget and make room for the one you want to add.
to remove a widget and make room for the one you want to add.
Swipe right from the Home Screen or Lock Screen.
Touch and hold a widget or an empty area in Today View until the apps jiggle.
Tap the Add button
in the upper-left corner.Scroll down to select a widget, then choose from three widget sizes.
Tap Add Widget, then tap Done.

You can configure your widgets. For example, you can edit the Weather widget to see the forecast for your current location or a different location.
To edit widgets from Today View:
Swipe right from the Home Screen or Lock Screen.
Touch and hold a widget to open the quick actions menu.
Tap Edit Widget
 .
.Make your changes, then tap outside of the widget to exit.

You can also move your widgets around to put your favorites where they're easier to find. Just touch and hold a widget until it jiggles, then move the widget around on the screen.
To edit widgets from your Lock Screen:
Tap the widget that you want to edit.
Make your changes, then swipe up to save the changes.
You can use widget stacks to save space on your Home Screen and in Today View. You can use Smart Stacks or create your own widget stacks.
A Smart Stack is a pre-built collection of widgets that displays the right widget based on factors like your location, an activity, or time. A Smart Stack automatically rotates widgets to show the most relevant information throughout the day.
To add a Smart Stack:
Touch and hold an area on your Home Screen or in Today View until the apps jiggle.
Tap the Add button
in the upper-left corner.Scroll down and tap Smart Stack.
Tap Add Widget.
Touch and hold an app or empty area on the Home Screen or Today View until the apps jiggle.
Drag a widget on top of another widget. You can stack up to 10 widgets.
Tap Done.
Touch and hold the widget stack.
Tap Edit Stack
 . From here, you can reorder the widgets in the stack by dragging and dropping the app where you want it in the stack. You can also turn Smart Rotate* on or off.
Tap Done.

* When Smart Rotate is on, iOS shows you relevant widgets throughout the day.
With iOS 15 and later, you can turn on Widget Suggestions, so apps you already use can automatically appear in your Smart Stack at the right time based on your past activity. An option lets you add the widget to your stack so its always there when you need it. Just follow steps 1-2, then tap Widget Suggestions to turn it on.
You need iOS 14 or later to use Smart Stacks or create your own widget stacks.
Touch and hold the widget that you want to remove.
Tap Remove Widget.
Tap Remove again to confirm.
Learn more about Widgets on your iPad.
Published Date:
Design and install your own custom Android Wear watch face
A simple guide to getting creative with your Wear watch
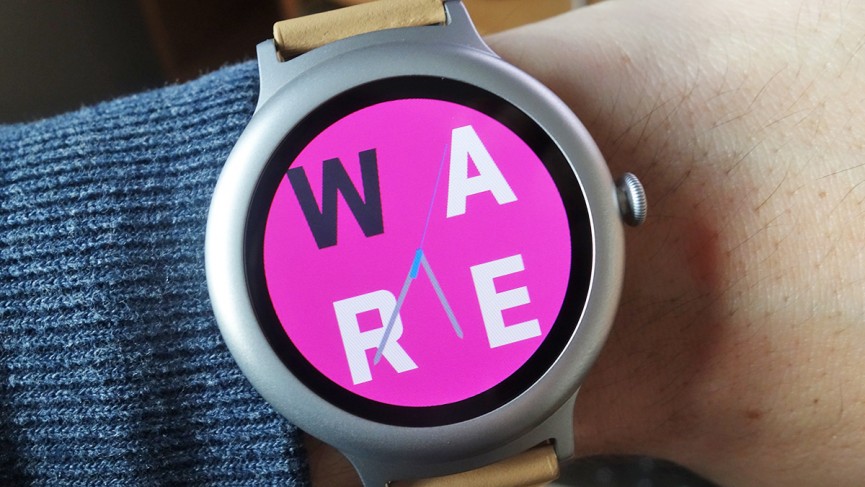
If you want your smartwatch to stand out from crowd, a customised watch face of your own is the way to go and just about every Android Wear watch makes it possible, provided you have the right app installed.
You dont need to be a design wizard or a coding genius, either, and its very possible to get something slick and personal on your watch in just a few minutes.
Read this: Android Wear 2.0 essential guide
Whether youre looking for something for your LG Watch Sport, Polar M600, or Tag Heuer Connected Modular 45, well show you one of the best apps for the job, and how to use it.
1. Choose your app


There are several different apps that let you design and install customised watch faces, and they all have broadly similar features: make a watch face of your own or pick one uploaded by another user from the general pool (some of them are actually very good).
They come at different price points, too. We dont have space to feature them all so here were going to focus on Facer, as its one of the slickest out there and is free to download. Android Wear Faces Creator and the imaginatively named WatchMaker Watch Face are good alternatives.

Facer doesnt take much time to get up and running and works like most other customisation tools you choose the app as the watch face (with a long press on the device or through the Android Wear app), then choose and sync the actual face from inside the app.
Read this: Android Wear tips and tricks
You need to register a Facer account if you want to be able to sync your designs. The app asks you what type of Android Wear watch you have, and you can then choose to browse through the faces already available however, we want to get busy making our own.
3. Launch the designer

Facer has a Web-based designer app that runs in your browser and makes more sense than tapping away on your phone or tablet you can find it at facer.io. Choose the shape and template you want to start with (digital or analogue) or pick a completely blank watch face.
Theres limited support for the Apple Watch, too. Meanwhile, down at the bottom you can see your existing designs, and from the same page theres access to some helpful how-to tutorials and the community pages (where you can turn for Facer tips and advice).
4. Get creative

Welcome to the Facer watch face editor! A clean and intuitive interface for designing your own faces: you can use the shape buttons to the right to switch between square and circular faces, and the timeline along the bottom to see how your design checks out through the day.
The panel on the left is where youll be going to add new stuff to your design, while clicking on objects in the middle brings up extra options and lets you move and resize them. For a very simple watch face, just use Background Image to load a new picture into the designer.

You can then use the Add Element button on the left to drop in new objects on top of your design, from digital clocks to weather widgets as the new elements appear in your project, new options show up to modify the colours and transparency as you need to.
Information like the time and the battery level can be added fairly easily but theres also the opportunity to make your own custom text, image and shape widgets if you have the time and inclination: Facer has a full reference guide if you fancy getting more creative.
6. Finish off your design

Switch to the Dim tab and you can play around with the way the watch face looks when its in standby mode remember you want it to use up as little battery power as possible, so youre best off making extensive use of black and dark shades when in this mode.
The Photoshop wizards among you can download a PSD template using the link on the left and use Adobes digital imaging software to build a watch face instead. Were just covering the basics of Facer here, but theres plenty more to explore if you want to go further.
7. Save (and share) your work

There are some basic options behind the Menu heading you might want to take advantage of, like a grid toggle button and a shareable link to your work. As soon as you click Save Draft from this menu, you should see the watch face appear inside the Facer app on your phone.
Smartwatch showdown: Apple Watch v Android Wear
If you want to keep your watch face private, thats all you have to do. If youd rather share it with the world at large, click the Preview Mode button to see it in a variety of different watch casings, then tick the Terms of Service box and click Submit for Approval.
8. Sync the watch face
If youre signed into the same Facer account on the web and on your mobile device then you should see your brand new creation in the My Designs section of the app (you can find it on the menu). Tap the design then the sync icon on the right to send it to your smartwatch.
Remember, Facer must be selected as your watch face for this to work. To double-check, go to the front page of the Android Wear app and choose Facer from the list of watch faces (or More if you cant see it) then tap the cog icon to jump into the Facer app from there.
9. Customising Android Wear 2.0

With the arrival of Android Wear 2.0, watch faces can have complications: small widgets that display information like the steps youve taken today or the current date, pulled from data provided by third-party developers (whether thats Spotify or Strava).
The Facer watch designer doesnt include complications yet, but you can edit them on existing faces from Google Play. Press and hold on your current watch face to enter edit mode (if it doesnt appear, the watch face doesnt currently support complications).
Scroll down to see your options, which may include the face colour and background image, depending on the watch face developer. Meanwhile, tap on any of the complication slots to bring up a list of possible widgets, based on the apps youve got installed.
You can, for example, have one of the complications showing a quick link to a favourite contact, readouts from Google Fit, the next item on your Google Calendar, an unread notification counter, or a link to a specific app on your smartwatch.
The available editing options are determined by the developer of the watch face, but theres far more flexibility with Android Wear 2.0
